Leave Your Message
AI Helps Write

10 Tips for Choosing a Dried Fruit Dryer?

Choosing the right Dried Fruit Dryer can affect flavor, texture, hygiene, and operating costs. A small home unit may suit sliced apples, mangoes, or herbs. A commercial processor needs stronger airflow, larger trays, and stable temperature control. The difference becomes obvious when fruit dries unevenly. Some pieces may remain soft while others turn dark and brittle.

This guide introduces ten practical tips for comparing dryer designs. It considers drying capacity, temperature accuracy, airflow direction, tray spacing, food-contact materials, cleaning access, energy use, noise, controls, and after-sales support. Stainless steel surfaces are often easier to inspect and sanitize. Removable trays also make daily cleaning less frustrating. Check the details, not only the product photos. A higher wattage rating does not always mean faster drying.

Reliable selection also requires attention to real working conditions. Measure your available space, electrical supply, batch size, and expected production schedule. Ask whether the dryer can maintain gentle heat for delicate berries and stronger airflow for dense fruit slices. Manufacturer specifications are useful, but practical testing reveals more. Request drying records, warranty terms, and maintenance guidance when possible.

No machine is perfect. A compact dryer may save space but demand more batches. A powerful model may shorten processing time but increase energy consumption. Even experienced users can overlook ventilation or cleaning time. These ten tips aim to make the decision clearer, safer, and more economical. The best choice is not necessarily the largest unit. It is the one that consistently produces clean, evenly dried fruit for your actual needs.
10 Tips for Choosing a Dried Fruit Dryer?

Define Your Drying Goals and Fruit Processing Needs

Before comparing a dried fruit dryer, define what “dry” means for your product.

Is the goal crisp apple slices, chewy mango, or shelf-stable raisins? Each target requires a different moisture endpoint and airflow strategy. Write down the fruit variety, slice thickness, starting moisture, expected daily volume, and desired texture. Small details matter. A thin pear slice can finish hours before a whole apricot half. Without these records, dryer capacity becomes guesswork rather than a technical decision.

Consider how the fruit will be prepared and handled.

Washing, cutting, blanching, or antioxidant treatment can change drying time and color retention. Measure temperature and humidity during trial runs, not only the control panel reading. Airflow should reach crowded trays evenly, because wet centers create quality and storage problems. Ask whether the chamber supports adjustable settings, washable surfaces, food-safe materials, and simple inspection. Practical reliability often matters more than impressive specifications.

Run several small batches with real fruit from different harvests.

Fruit behaves inconsistently; sugar levels and ripeness can change the result. Keep samples from the center and edges, then check texture after cooling. A batch may feel dry while warm but soften later. That mistake is easy to make. Record energy use, processing time, yield, and cleaning effort. No test is perfect. Compare the results with your production goals before choosing equipment.
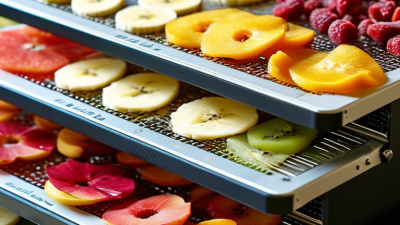
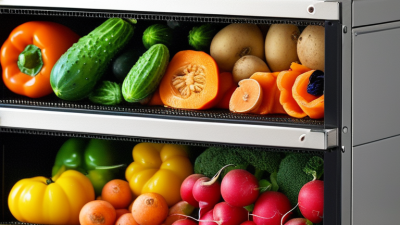
Compare Dryer Types, Capacity, and Available Space

Choosing a dried fruit dryer starts with your available space, not the advertised capacity. FAO’s State of Food and Agriculture 2019 reported that 14% of food is lost between harvest and retail worldwide. A suitable dryer can help reduce losses, but only when airflow matches the product load.

Tip 1 Measure the room first.

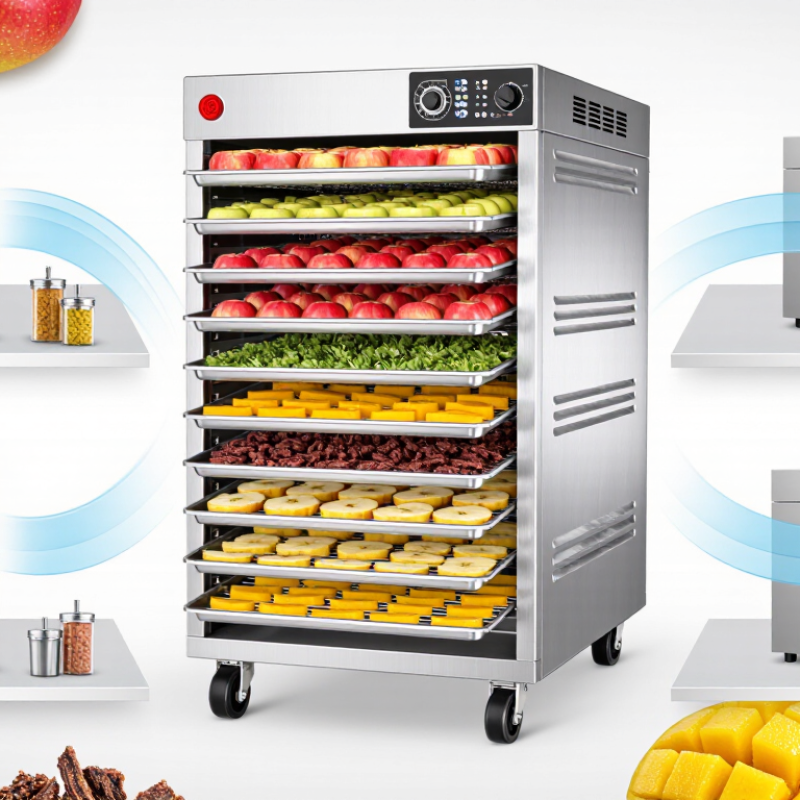
Record floor area, ceiling height, door width, ventilation, and power access. Tray dryers suit compact rooms and small batches. Tunnel dryers need longer operating space but offer steadier production. Rotary systems handle larger volumes, although loading and cleaning require more room. Leave clear access around fans and heating components. This detail is often missed.

Tip 2 Compare useful capacity, not chamber volume.

Fresh fruit contains substantial water, so the final dried weight may be far lower. Test one batch before purchasing. For example, a 20-kilogram load may occupy different tray areas after slicing. Moisture, slice thickness, and airflow change the result. The UNEP Food Waste Index Report 2024 estimated 1.05 billion tonnes of food waste in 2022, showing why efficient preservation deserves careful planning.

Tip 3 Match the dryer to your weekly schedule.

An electric cabinet model may fit a small processing room, while a larger heat-pump or tunnel unit can reduce repeated loading. Check temperature control, cleaning access, insulation, and power consumption. Professional specifications are useful, but real output may disappoint without consistent slicing. I would test capacity during the busiest season, not on a quiet day.

Check Temperature Control, Airflow, and Drying Consistency

Choosing a dried fruit dryer starts with temperature control, not advertised capacity. Look for an adjustable digital controller with small, stable temperature steps. Fruits lose color and flavor when heat rises too quickly. A useful dryer should also include overheat protection and an independent temperature sensor.

Check airflow carefully. Hot air must reach every tray, including the corners. Rear-mounted fans can work well, but uneven loading may still create wet and brittle pieces. Removable trays make airflow testing easier. Place apple slices on several levels, then compare their texture after drying. A handheld thermometer or data logger can reveal cold spots that the display misses.

Drying consistency matters more than speed. Choose a chamber with sealed doors, strong insulation, and steady air circulation. Examine whether trays rotate, or whether their positions must be changed manually. My early tests often ignored tray spacing, which caused misleading results. Leave room between pieces, and record temperature, drying time, slice thickness, and final weight. A reliable process should produce similar results across repeated batches. It should also allow simple cleaning, because fruit sugar can collect around fans and door seals. Check calibration regularly. Even accurate sensors can drift. Some batches will still need adjustment because moisture differs between harvests. That is not a machine failure, but it deserves careful attention.

Evaluate Energy Use, Materials, Safety, and Cleaning

10 Tips for Choosing a Dried Fruit Dryer?

Evaluate Energy Use, Materials, Safety, and Cleaning

A reliable dried fruit dryer should show its energy use clearly. Check the wattage, temperature range, and expected drying time. A watt meter can reveal the real cost per batch. Insulated walls and an efficient fan may reduce heat loss. However, lower wattage does not always mean lower consumption. A weak heater can run much longer. I once overlooked this during a small kitchen test.

Choose food-contact materials that resist corrosion and retain little odor. Stainless steel trays are practical for acidic fruits and repeated use. Smooth surfaces also make inspection easier. Avoid sharp corners, peeling coatings, and hidden seams. These details often collect sticky sugar and moisture. Tray spacing matters too. Crowded slices dry unevenly.

Safety deserves direct attention. Look for stable feet, heat-resistant handles, overheat protection, and a clearly grounded power system. A guarded fan reduces contact risks during cleaning. Keep the controls away from dripping fruit juice. Read the operating instructions before testing unusual loads. Do not trust appearance alone. A polished cabinet may still have poor internal wiring.

Cleaning

Cleaning should take minutes, not an entire evening. Removable trays, accessible filters, and washable drip areas help. Use mild detergent unless the manual permits stronger products. Dry every part completely before storage. I still find cleaning the rear vent easy to forget. That small omission can affect airflow and create unpleasant odors. Check seals, cords, and tray edges regularly. Reliability is built through these repeated checks.

Assess Controls, Maintenance, Warranty, and Total Cost

Tip 1: Check whether temperature, airflow, and drying time adjust independently. A small digital display helps, but simple buttons may prevent mistakes. Test the controls with wet hands nearby, not inside the chamber. Look for stable readings rather than attractive features.

Tip 2: Ask whether the machine records temperature changes. This information can reveal uneven drying and improve future batches.

Tip 3: Inspect the trays, fan area, seals, and drainage points before buying. Removable parts should lift out without special tools. Smooth surfaces reduce residue around sliced mango or sticky dates. Ask how often filters need cleaning. A neglected filter can restrict airflow and extend drying time. That cost is easy to miss.

Tip 4: Confirm coverage for the heating element, fan, sensors, and control panel. Also check labor, replacement parts, shipping, and response times. A long warranty means little if important components are excluded.

Tip 5: Calculate total cost using energy use, cleaning supplies, repairs, downtime, and expected tray replacement. The lowest purchase price may not be the lowest operating cost. I would also request a maintenance schedule in writing. Some estimates seem precise, but real electricity use can vary with fruit thickness, room temperature, and loading habits. That uncertainty deserves attention.